As most model railroaders know when a locomotive’s bell starts to ring it is a warning “Look out, I’m moving”! The de facto standard to turn on the bell is function 1 (F1) and when pressed it starts to ring immediately and to turn the ringing off press F1 again or else it would ring continuously (blah!!). What if we changed things a little to have an automatic bell, i.e. press a function key and from then on when the engine is given a drive command the bell will start ringing and also stop ringing when a certain speed (call it S1) is reached. Also, we would like the bell to start ringing again when slowing and its speed drops below S1 and continuing until either it’s accelerated again beyond S1 or stopped in which case it stops ringing. This would be prototypical and similar to the engineer handling the bell without us having to worry about it.
As Ted Wentz showed on the LokSound groups.io forum this is not difficult to do if you have some experience with modifying ESU sound schedules. That would include doing some of the modification tutorials I’ve given in previous posts such as this one. I've taken Ted's demonstration and modified it to prevent the throttle from prematurely turning off the bell while the engine is still moving.
Before
we begin, ESU has added the Auto Bell On/Off Template Pack to many of their
sound files for modern engines on Function 2 to ring the bell when the horn sounds.
You can read about controlling this in any sound file’s accompanying bulletin
that has this functionality. The problem this creates is it will interfere with
the auto bell feature we’re going to create on engine moving and engine
stopping if the engine gives the standard two horn blasts to indicate forward
movement. This tutorial assumes that the ESU auto bell feature is turned off.
We’ll
use the ESU sound file S0539-LS5H0DCC-Diesel-EMD-12-645E3-T-V4-R4.esux located
here. Let’s get started
and you’ll see how easy it is.
First,
in the Sound pane Overview sheet you’ll see that slot 2 is empty. Create an
empty sound slot sound file by double clicking on it and naming it Auto
Movement Bell. Add a container and connect it to mute using 2 transitions as
shown in fig 1. Call the container Bronze Bell. We’ll come back to this
shortly.
Double
click on the container then drag and drop one of the bell loop files from the
sound collection in the lower right corner to the created state. We’ll just
pick the first one. Add 2 basic transitions as shown in fig 2.
That’s
all there is to the state so we’re done with it. Now, back to the container and
its transitions which are the heart of the sound file.
Add
3 grouped conditions:
- function = true
- Whatever function
you assign to this sound file must be “on”
- speed > 0
- don’t start the bell
until the engine starts moving
- speed < SoundCV16
- use speed to
determine when to turn off the bell
This
is shown in fig 3.
Figure 4 SoundCV16
There
is almost always a free SoundCV available but I say almost because I have seen
sound files where there were none.
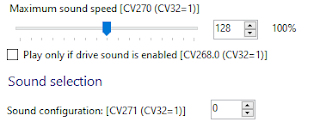
<Update 2022-10-16>There is another variable that can be used in place of SoundCVs. At the bottom of the Sound Slot Settings pane is the Sound Configuration variable shown in fig 5.

Utilizing
the Simulator you can test this to make sure the bell sound you chose is what
you want. Notice there are several different bell loop sound files included, some good, some not so good, so
pick the one that works for you. Also note that you can use any function number
you want to. It doesn’t have to be function 1 as shown in figure 5.
<Update 2025-05-27>
There is a newer version of this exercise ESU Autobell With Start, Loop and End Files Employed that has a bit more complicated logic but nothing too difficult. Whichever one you decide on is up to you.
Next up will be automatic horn forward and reverse start and stop signals
Enjoy!
If you have an idea for a blog post here, let me know. If I can comment on it, I will or I'll see if someone else can and post it.


No comments:
Post a Comment